5.5 KiB
🥇 Maza was Top 1 in Hacker News
Comments: https://news.ycombinator.com/item?id=22717650

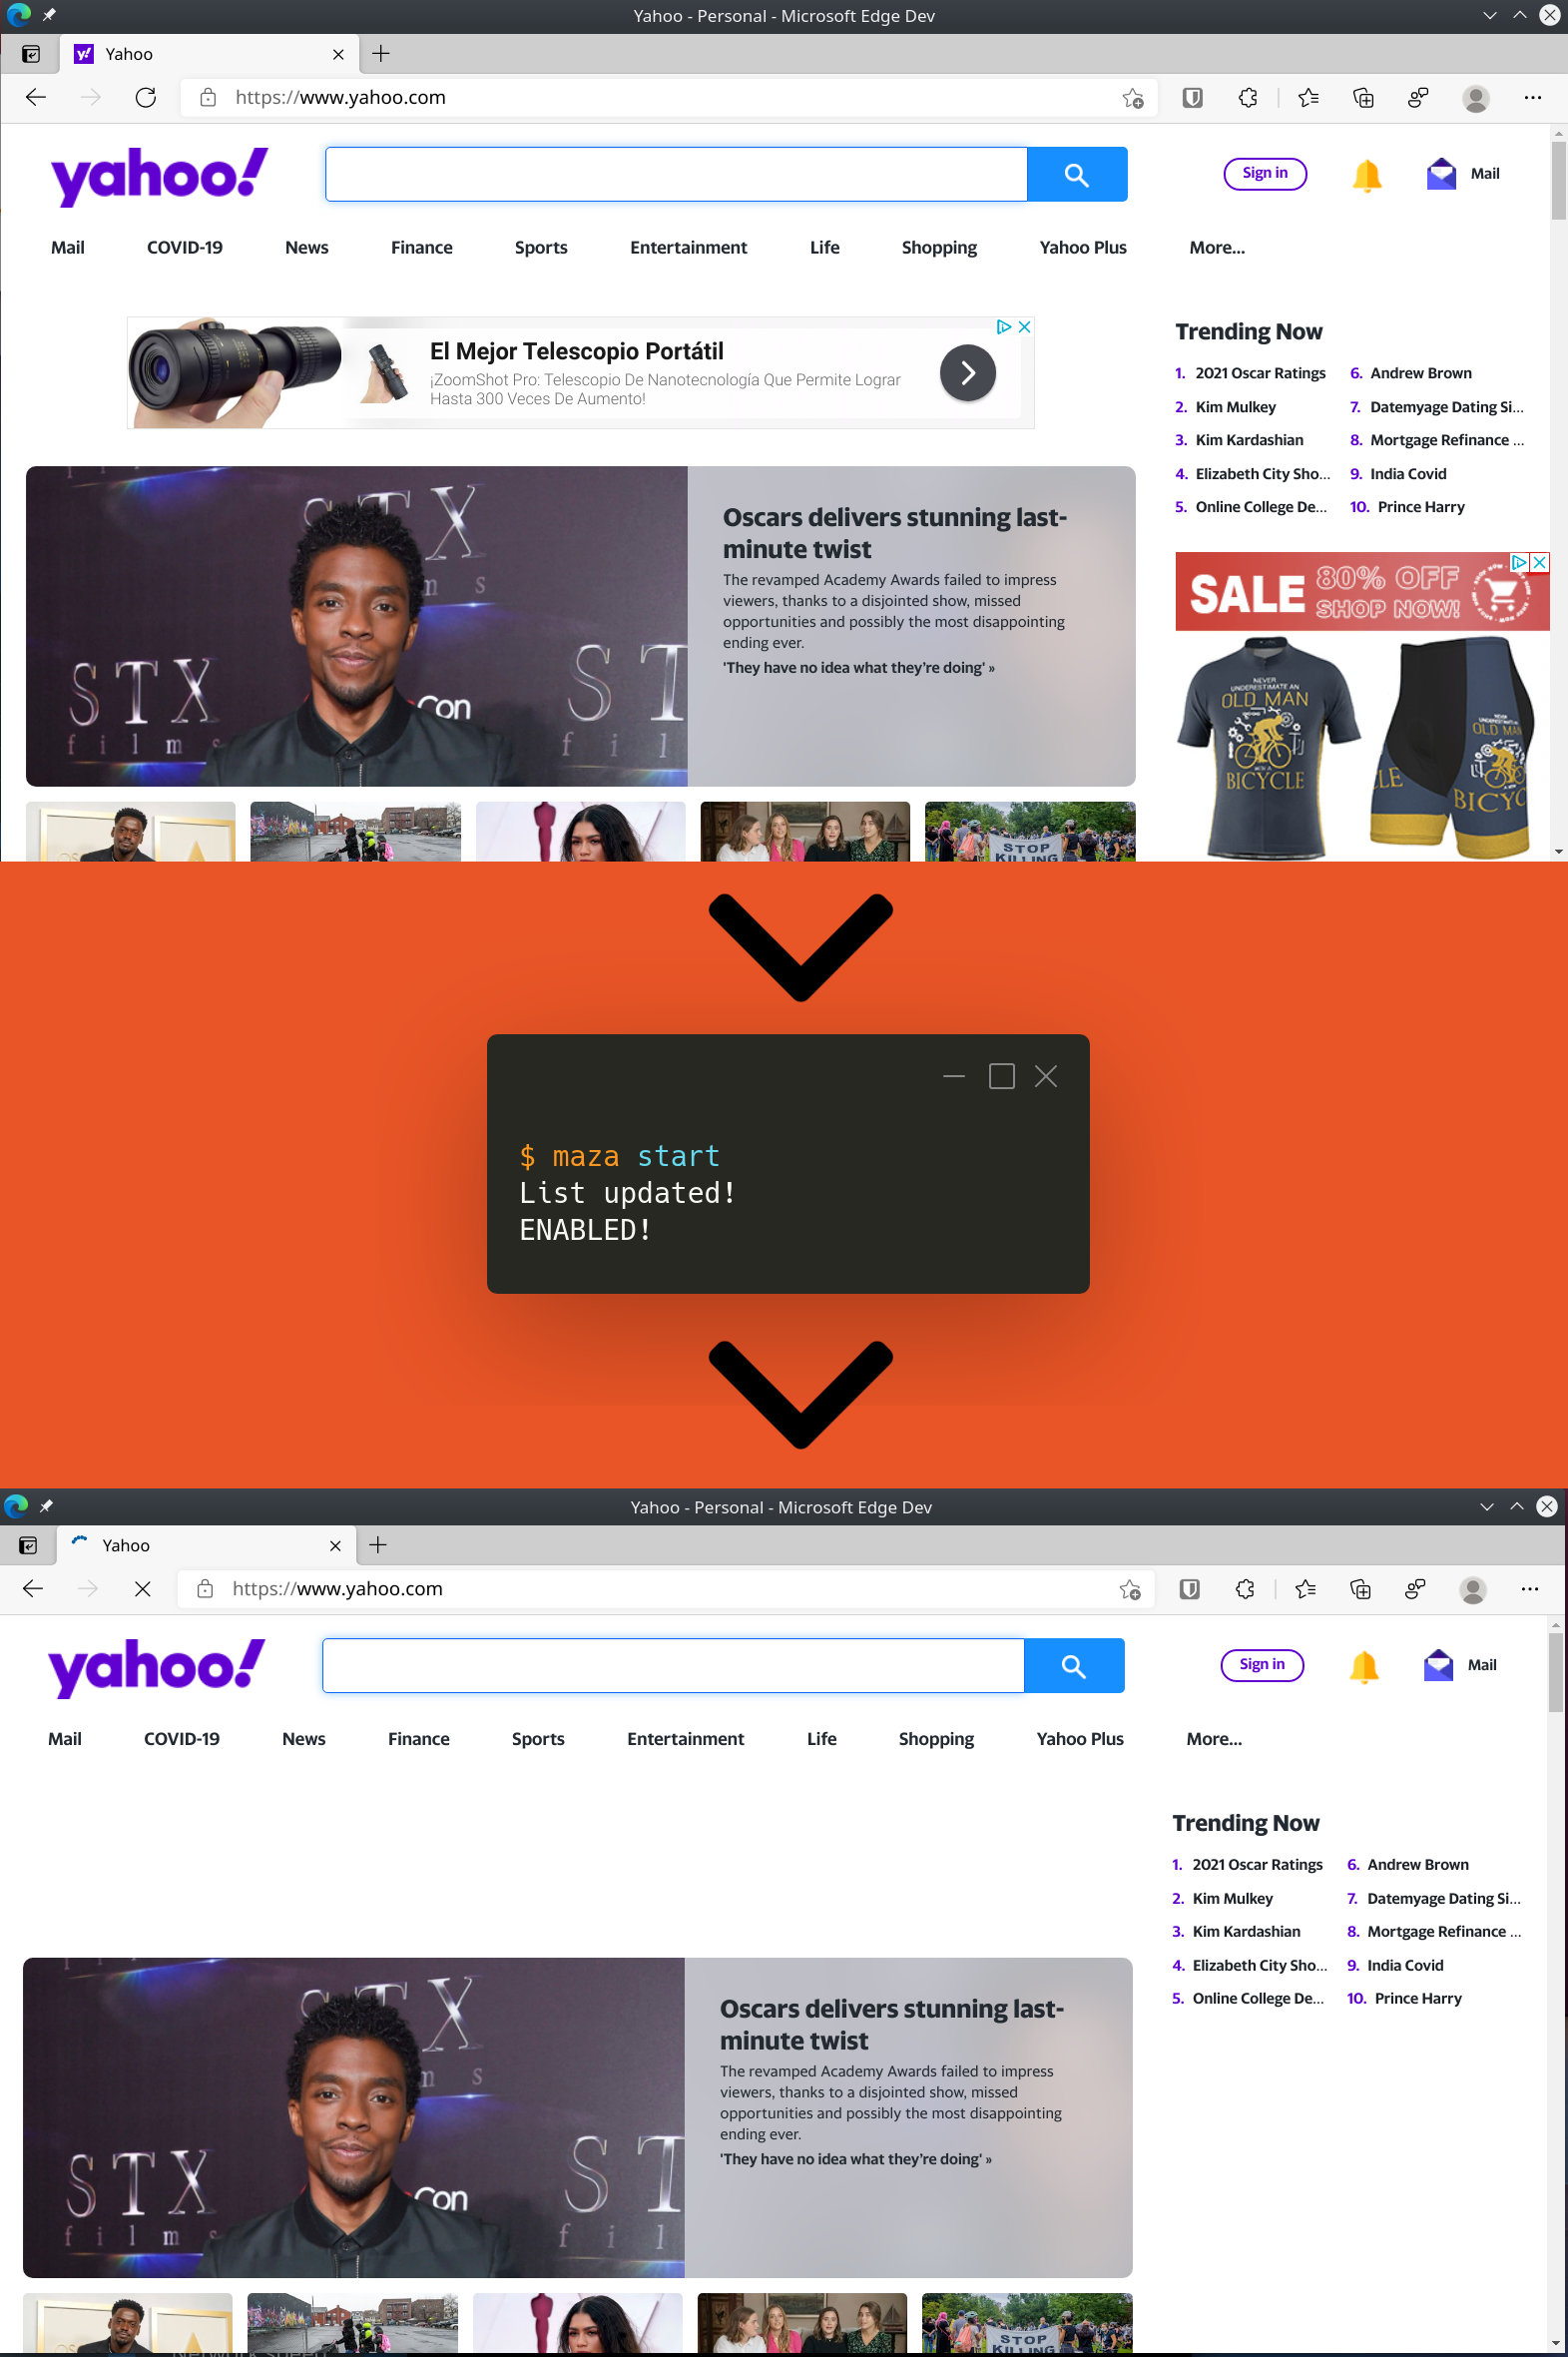
A command to squash all ads in all browsers
sudo maza start
Like Pi-hole but local and using your operating system.
Simple, native and efficient local ad blocker. Bash script compatible with MacOS, Linux and BSD.
- You don't have to install any browser extensions or applications, you just use the tools of your operating system.
- You update the list of DNS to be blocked with a single command.
- It affects any browser or software installed.
- Pure Opensource.
- Just bash.
Help me continue to improve
![]()
📟 Commands
📡 Update database
maza update
🔨 Start
sudo maza start
🛠 Stop
sudo maza stop
⚖️ Status
maza status
⚙️ Install
😥 Requirements
- bash 4.0 or higher
- curl
- Only macOS users, gsed:
brew install gnu-sed
Then you do this.
curl -o maza https://raw.githubusercontent.com/tanrax/maza-ad-blocking/master/maza && chmod +x maza && sudo mv maza /usr/local/bin
Optional but recommended, make a backup of your hosts file.
sudo cp /etc/hosts /etc/hosts.backup
🤖 Auto update of domains to be blocked
Open your cron.
crontab -e
Add the following line at the end.
@daily maza update
🔪 Uninstall
sudo rm /usr/local/bin/maza && sudo rm -r ~/.maza
🔒 Alternative DNS list
By default the Yoyo DNS list (Peter Lowe) is used. If you want to use another list, like Steven Black's for example, you must modify the variable in line 7.
It would go from:
URL_DNS_LIST="https://pgl.yoyo.org/adservers/serverlist.php?showintro=0&mimetype=plaintext"
To the following:
URL_DNS_LIST="https://raw.githubusercontent.com/StevenBlack/hosts/master/hosts"
DNSMASQ
Unfortunately the hosts file does not support sub-domains (wildcards), which is necessary to correctly filter all DNS. You will need to install locally a server for that purpose, Maza supports the Dnsmasq format.
MacOS
0 Update Maza
maza update
1 Install
brew install dnsmasq
2 Configure
Edit the file.
/usr/local/etc/dnsmasq.conf
Add the following line at the end.
conf-file=(your user path)/.maza/dnsmasq.conf
Example
conf-file=/Users/myuser/.maza/dnsmasq.conf
Start DNSMASQ.
sudo brew services stop dnsmasq
sudo brew services start dnsmasq
3 Tell your OS to use your DNS server
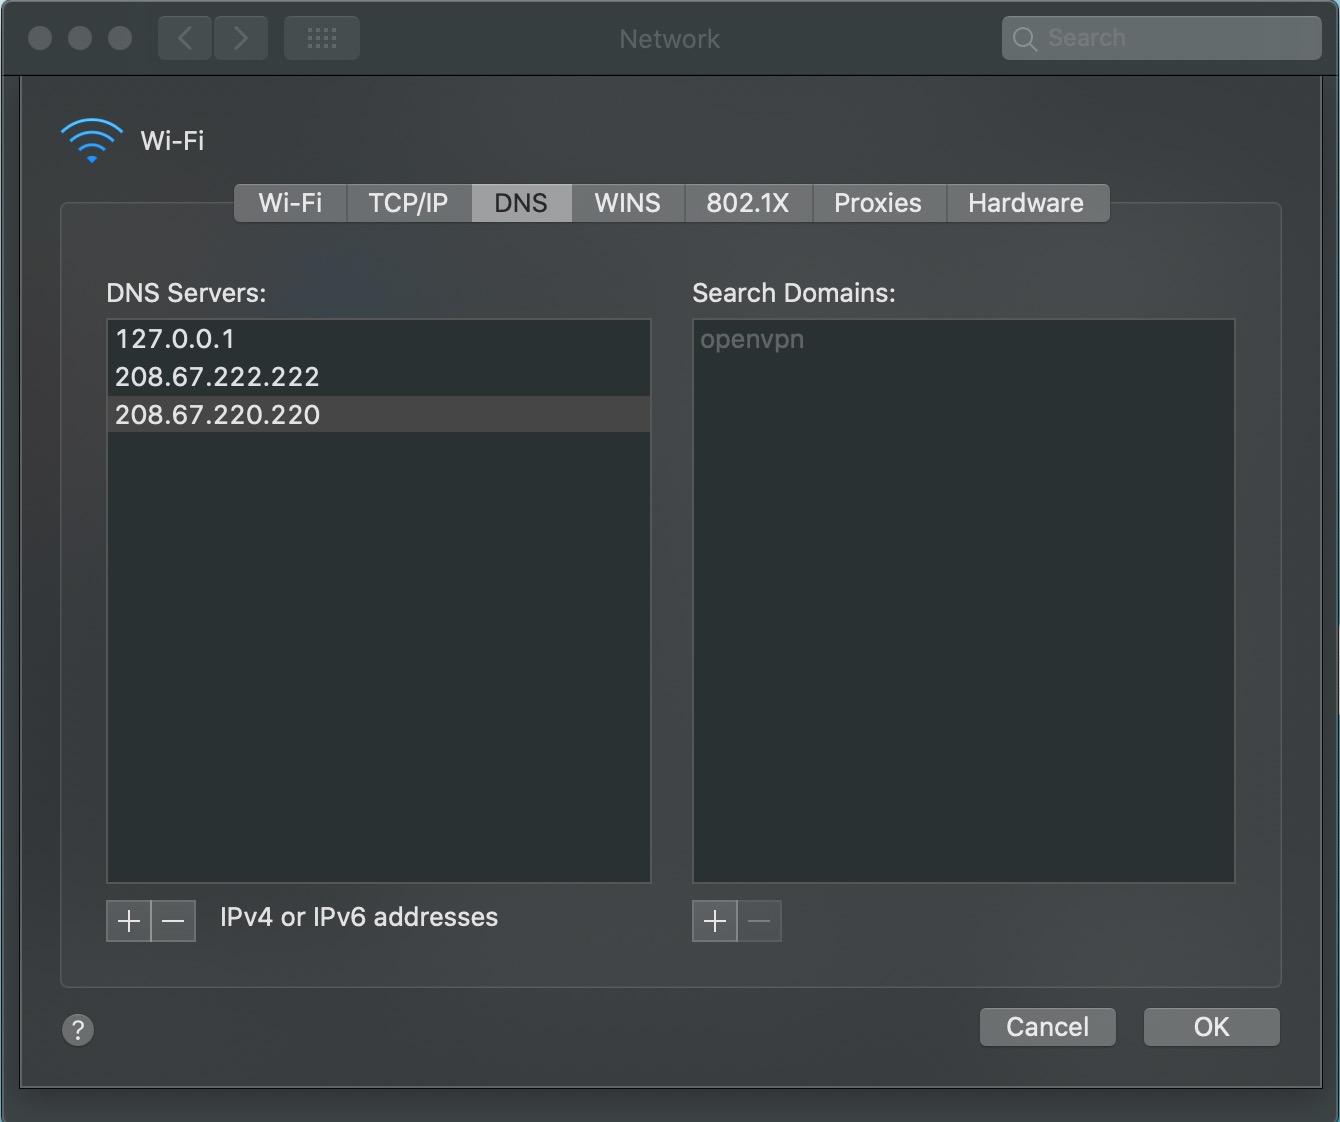
Delete the list of macOS DNS servers and add the 3 addresses. The first one will be your local server, and the other 2 belong to OpenDNS, which you can use any other.
127.0.0.1
208.67.222.222
208.67.220.220
Refresh your DNS cache
sudo dscacheutil -flushcache; sudo killall -HUP mDNSResponder
4 Restart/Start Maza
sudo maza stop
sudo maza start
Linux (Debian/Ubuntu)
0 Update Maza
maza update
1 Install
sudo apt update
sudo apt install dnsmasq
2 Configure
Edit file in path.
/etc/dnsmasq.conf
Add the following line at the end.
conf-file=(your user path)/.maza/dnsmasq.conf
Example
conf-file=/home/myuser/.maza/dnsmasq.conf
Start DNSMASQ.
sudo systemctl stop dnsmasq
sudo systemctl start dnsmasq
sudo systemctl enable dnsmasq
3 Tell your OS to use your DNS server
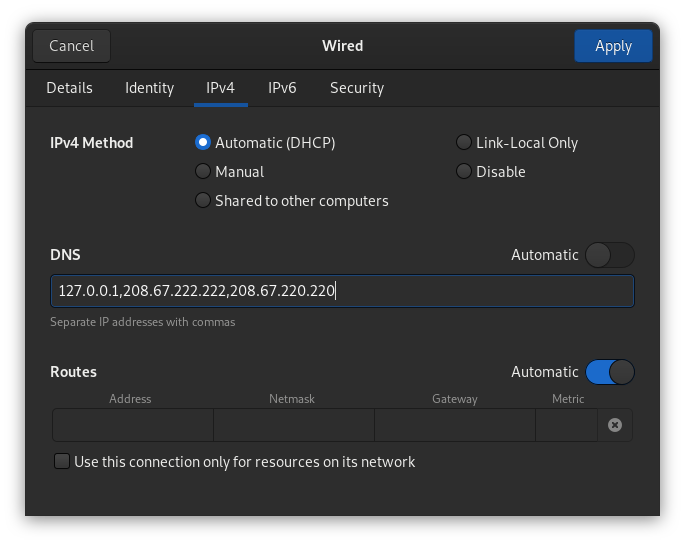
3.1 Gnome Shell
In Gnome Shell, open Settings->Nework. Click in your connection.
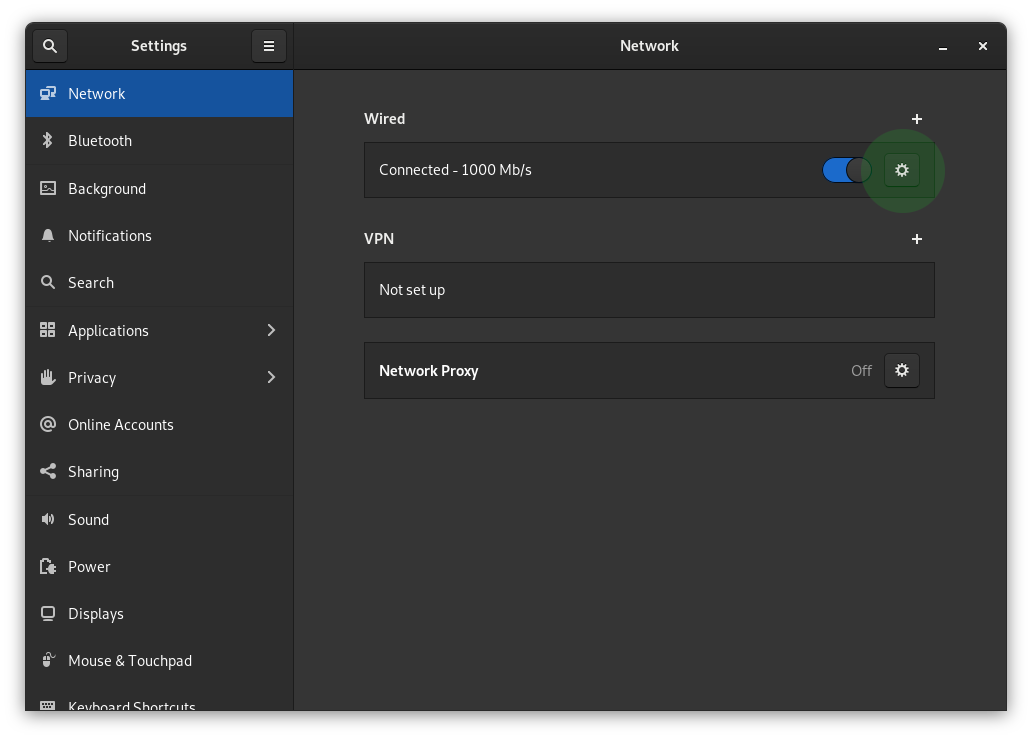
Add your local server (dnsmasq), and the other 2 belong to OpenDNS, which you can use any other.
127.0.0.1,208.67.222.222,208.67.220.220
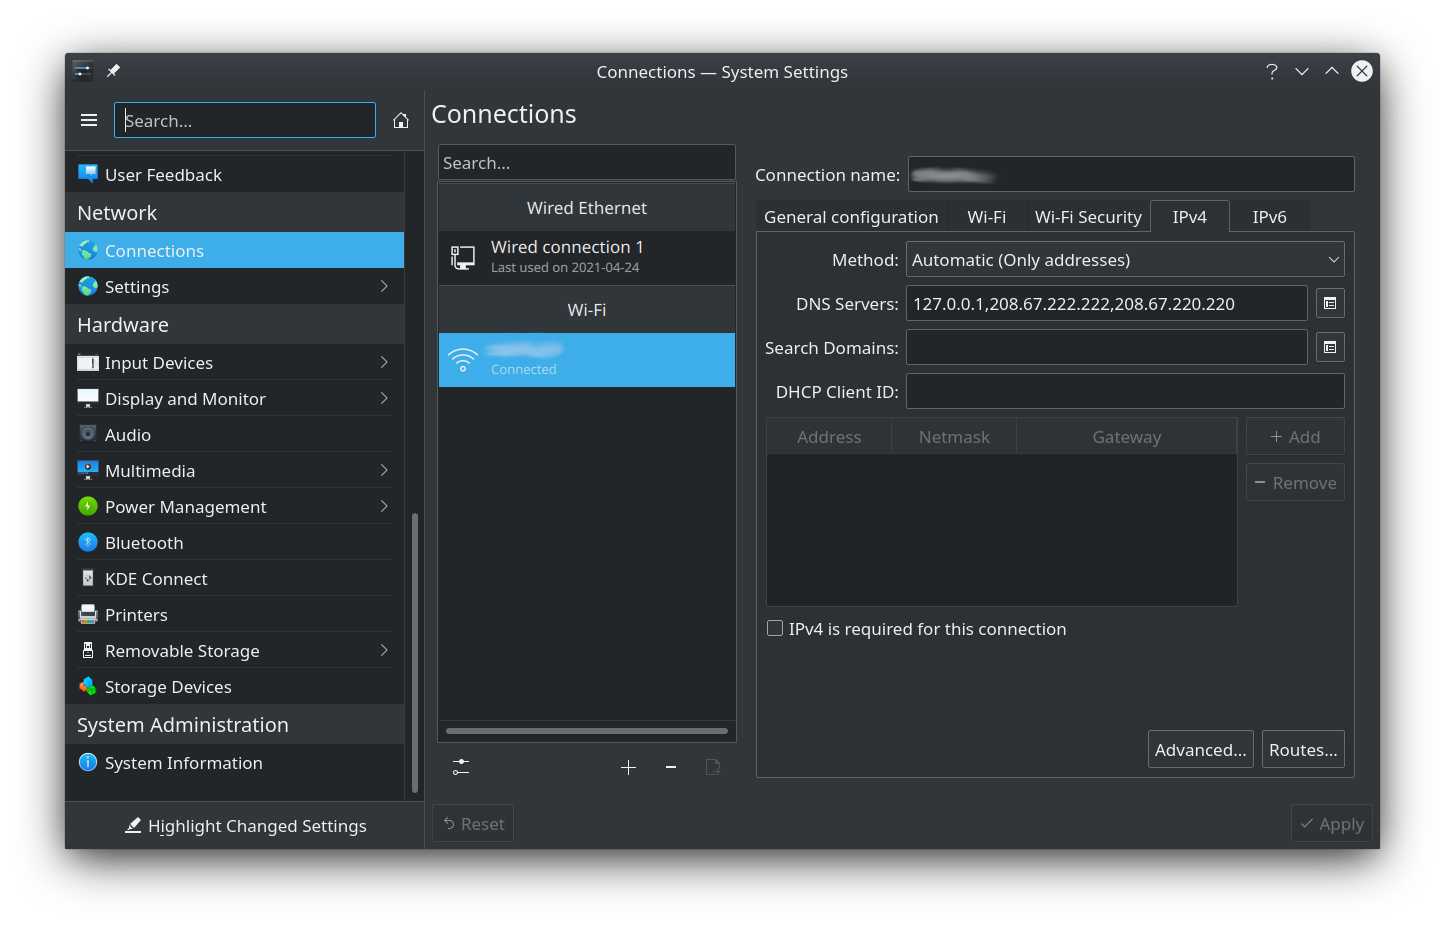
3.2 KDE Plasma
In KDE Plasma, open Settings->Nework->Connectios. Click in your connection and tab ip4.
Method: Automatic (Only addresses).
Add your local server (dnsmasq), and the other 2 belong to OpenDNS, which you can use any other.
DNS Servers:127.0.0.1,208.67.222.222,208.67.220.220.
4 Restart/Start Maza
sudo maza stop
sudo maza start
Bonus: dnsmasq is in charge of solving all DNS
Add in configure file: /usr/local/etc/dnsmasq.conf
no-resolv
server=208.67.222.222
server=208.67.220.220
Bonus: dnsmasq have localhost domains
If you want all your .localhost domains, for example, point to localhost add in configure file: /usr/local/etc/dnsmasq.conf or /etc/dnsmasq.conf.
address=/.localhost/127.0.0.1
⚠️ CAUTION
- Only compatible with Linux and macOS operating systems.
- Remember to make a backup copy of
/etc/hostsin case of unforeseen circumstances, neither the project nor its author will be responsible for any possible repercussions derived from not carrying out this action.