🥇 Maza was Top 1 in Hacker News
Comments: https://news.ycombinator.com/item?id=22717650

Like Pi-hole but local and using your operating system
Simple, native and efficient local ad blocker. Bash script compatible with MacOS, Linux and BSD.
- You don't have to install any browser extensions or applications, you just use the tools of your operating system.
- You update the list of DNS to be blocked with a single command.
- It affects any browser or software installed.
- Pure Opensource.
- Just bash.

Become a Patron
📟 Commands
📡 Update database
maza update
🔨 Start
sudo maza start
🛠 Stop
sudo maza stop
⚖️ Status
maza status
⚙️ Install
😥 Requirements
- bash 4.0 or higher
- curl
- Only macOS users, gsed:
brew install gnu-sed
Then you do this.
curl -o maza https://raw.githubusercontent.com/tanrax/maza-ad-blocking/master/maza && chmod +x maza && sudo mv maza /usr/local/bin
Optional but recommended, make a backup of your hosts file.
sudo cp /etc/hosts /etc/hosts.backup
🤖 Auto update of domains to be blocked
Open your cron.
crontab -e
Add the following line at the end.
@daily maza update
🔪 Uninstall
sudo rm /usr/local/bin/maza && sudo rm -r ~/.maza
DNSMASQ
Unfortunately the hosts file does not support sub-domains (wildcards), which is necessary to correctly filter all DNS. You will need to install locally a server for that purpose, Maza supports the Dnsmasq format.
MacOS
1 Install
brew install dnsmasq
2 Configure
Edit the file.
/usr/local/etc/dnsmasq.conf
Add the following line at the end.
conf-file=(your user path)/.maza/dnsmasq.conf
Example
conf-file=/Users/myuser/.maza/dnsmasq.conf
Start DNSMASQ.
sudo brew services stop dnsmasq
sudo brew services start dnsmasq
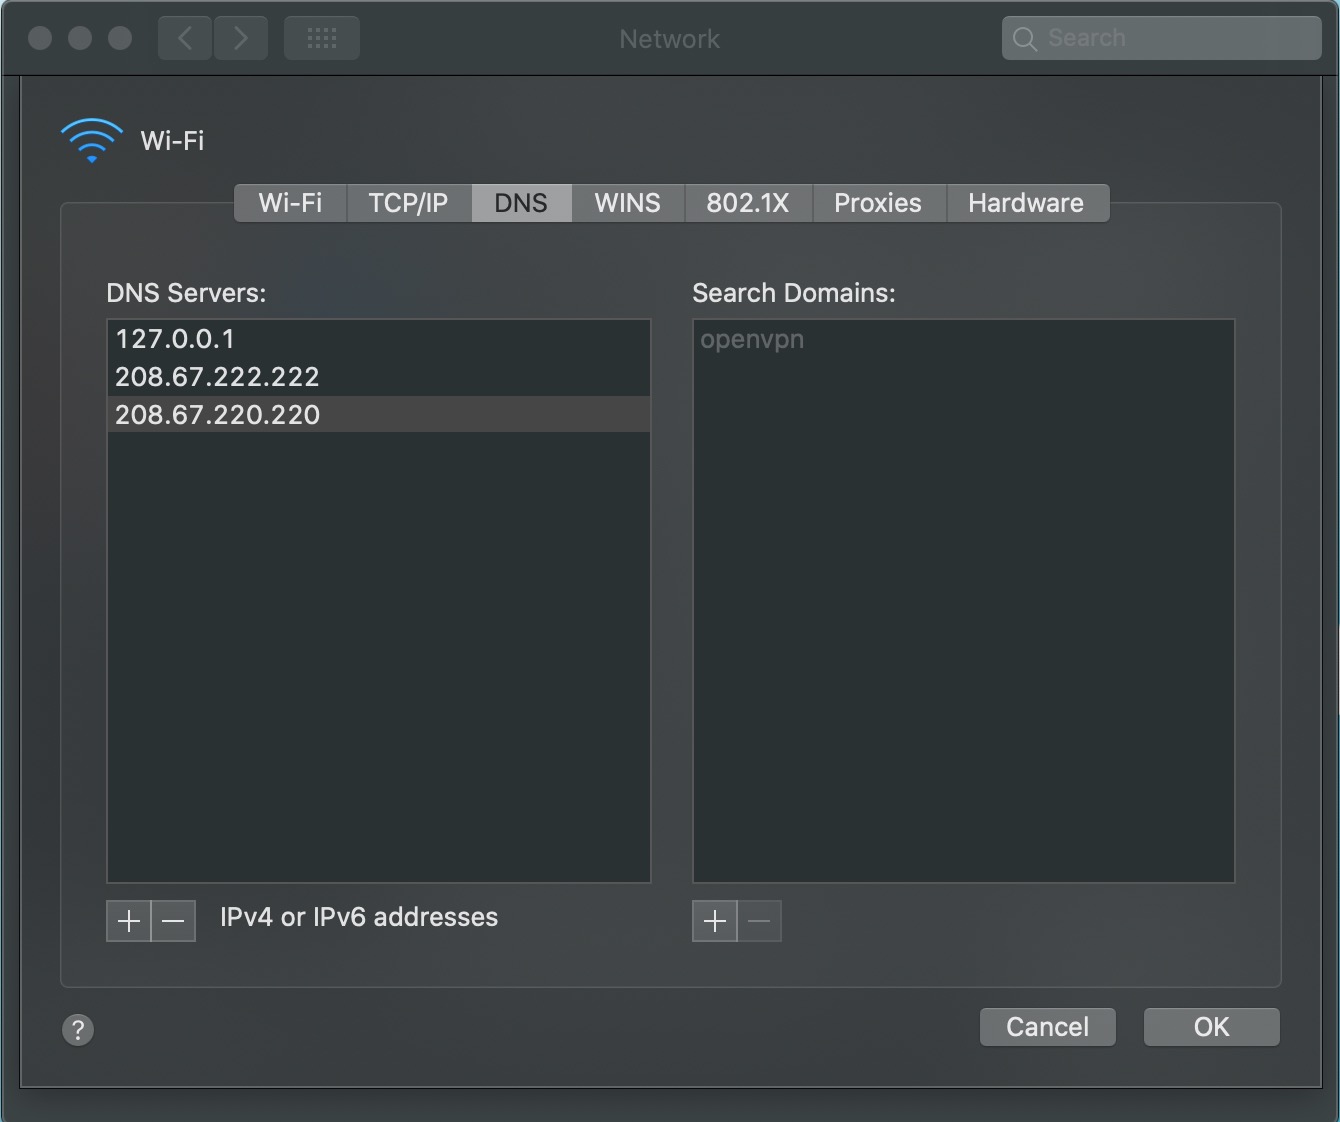
3 Tell your OS to use your DNS server
Delete the list of macOS DNS servers and add the 3 addresses. The first one will be your local server, and the other 2 belong to OpenDNS, which you can use any other.
127.0.0.1
208.67.222.222
208.67.220.220

Refresh your DNS cache
sudo dscacheutil -flushcache; sudo killall -HUP mDNSResponder
4 Restart/Start Maza
sudo maza stop
sudo maza start
Debian/Ubuntu with Gnome Shell
1 Install
sudo apt update
sudo apt install dnsmasq
2 Configure
Edit file in path.
/etc/dnsmasq.conf
Add the following line at the end.
conf-file=(your user path)/.maza/dnsmasq.conf
Example
conf-file=/home/myuser/.maza/dnsmasq.conf
Start DNSMASQ.
sudo systemctl stop dnsmasq
sudo systemctl start dnsmasq
sudo systemctl enable dnsmasq
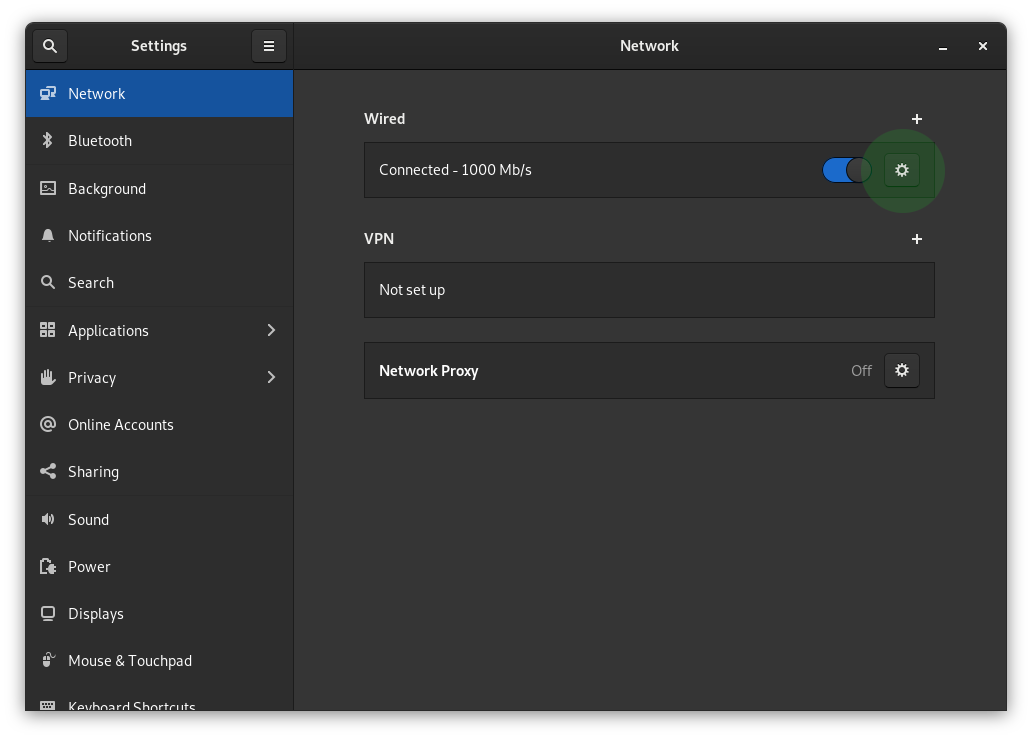
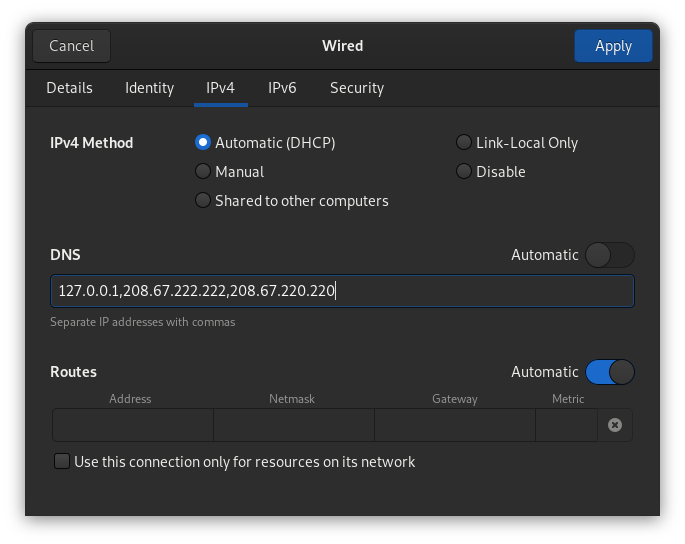
3 Tell your OS to use your DNS server
In Gnome Shell, open Settings->Nework. Click in the sprocket of your connection.

Add your local server (dnsmasq), and the other 2 belong to OpenDNS, which you can use any other.
127.0.0.1,208.67.222.222,208.67.220.220

4 Restart/Start Maza
sudo maza stop
sudo maza start
Bonus: dnsmasq is in charge of solving all DNS
Add in configure file: /usr/local/etc/dnsmasq.conf
no-resolv
server=208.67.222.222
server=208.67.220.220
Bonus: dnsmasq have localhost domains
If you want all your .localhost domains, for example, point to localhost add in configure file: /usr/local/etc/dnsmasq.conf or /etc/dnsmasq.conf.
address=/.localhost/127.0.0.1
⚠️ CAUTION
- Only compatible with Linux and macOS operating systems.
- Remember to make a backup copy of
/etc/hostsin case of unforeseen circumstances, neither the project nor its author will be responsible for any possible repercussions derived from not carrying out this action.
